Cloud compilation
RMK provides a project-template that you can use to create your firmware easily. The following is a step-by-step tutorial for compiling RMK firmware using Github Actions.
There are some limitations currently for cloud compilation via Github Actions. For example, you cannot edit cargo features in the generated project. If you have any problems when compiling RMK on the cloud, please open an issue!
Steps
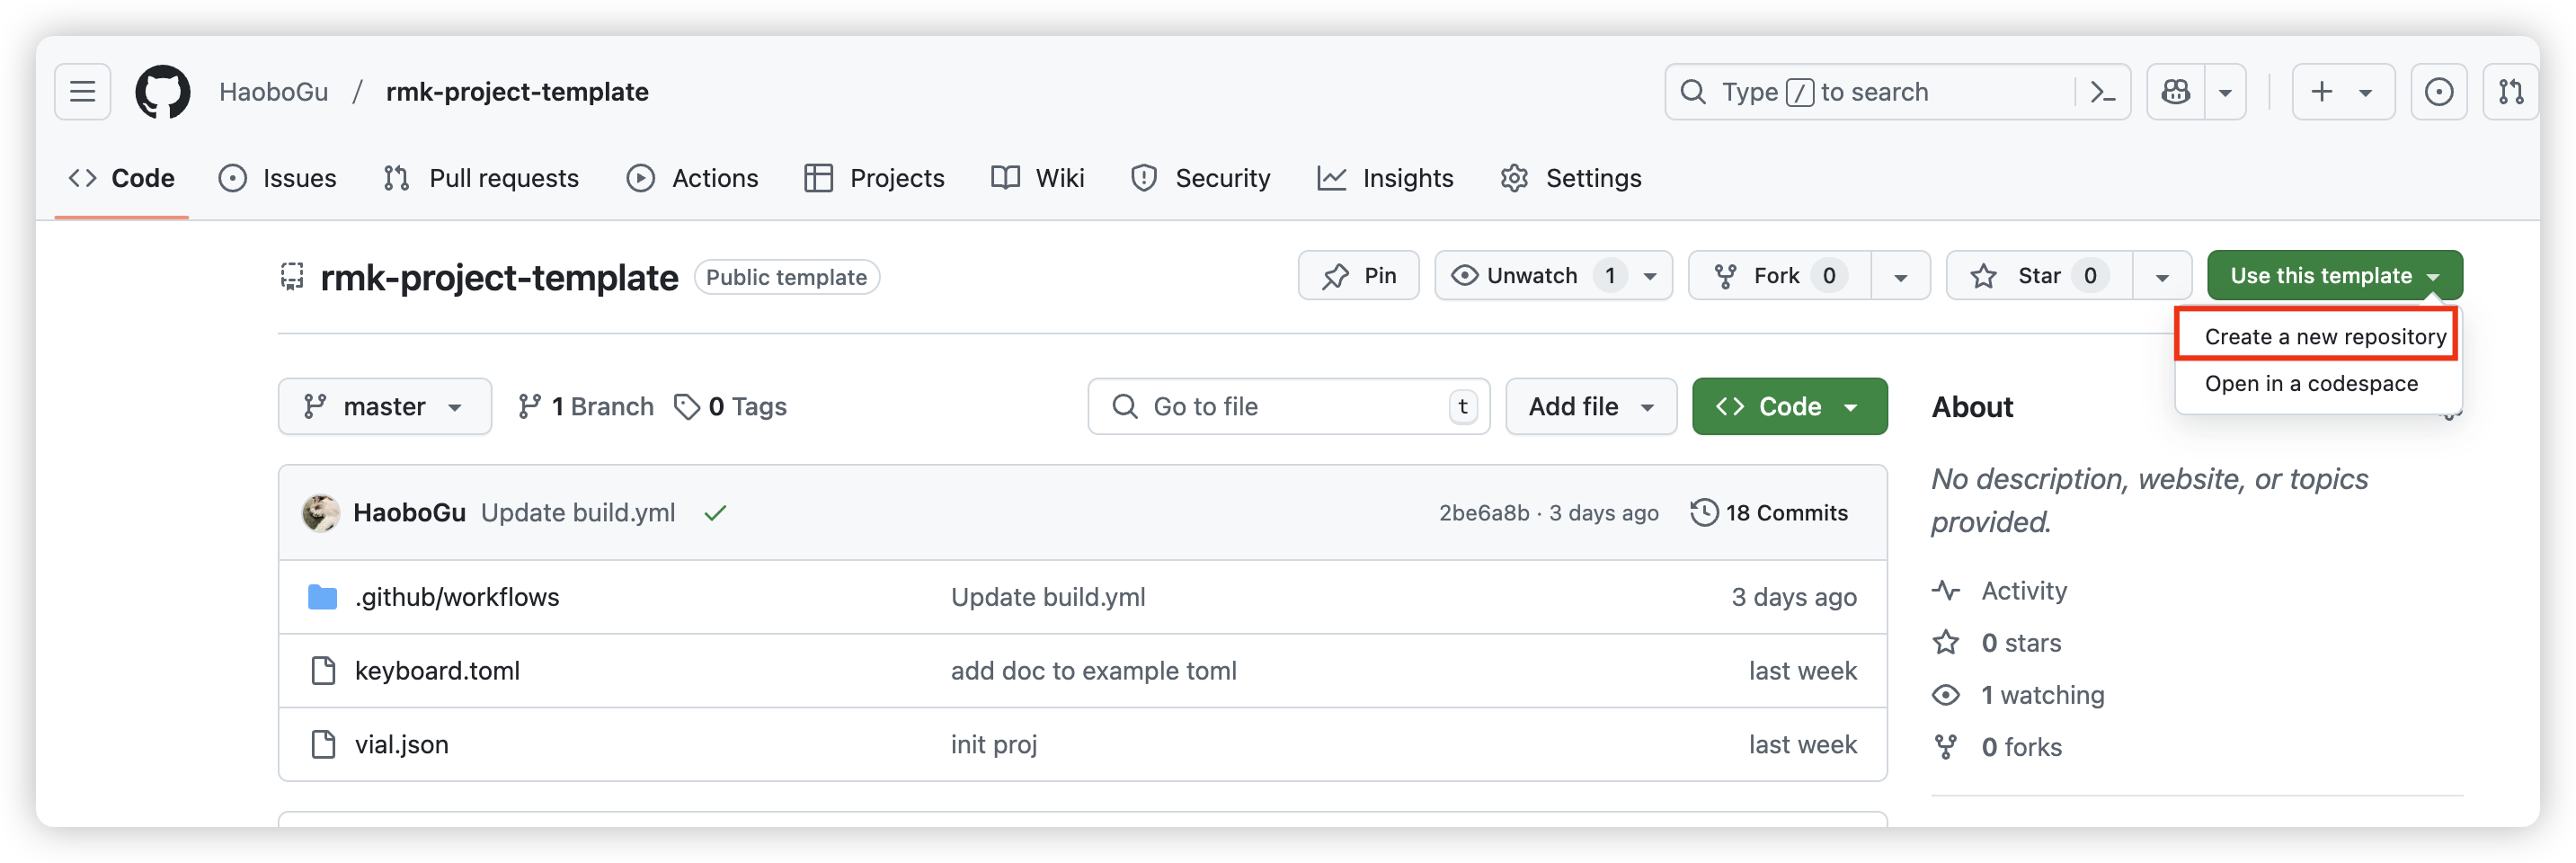
- To get started, open project-template, click
Use this templatebutton and chooseCreate a new repository:
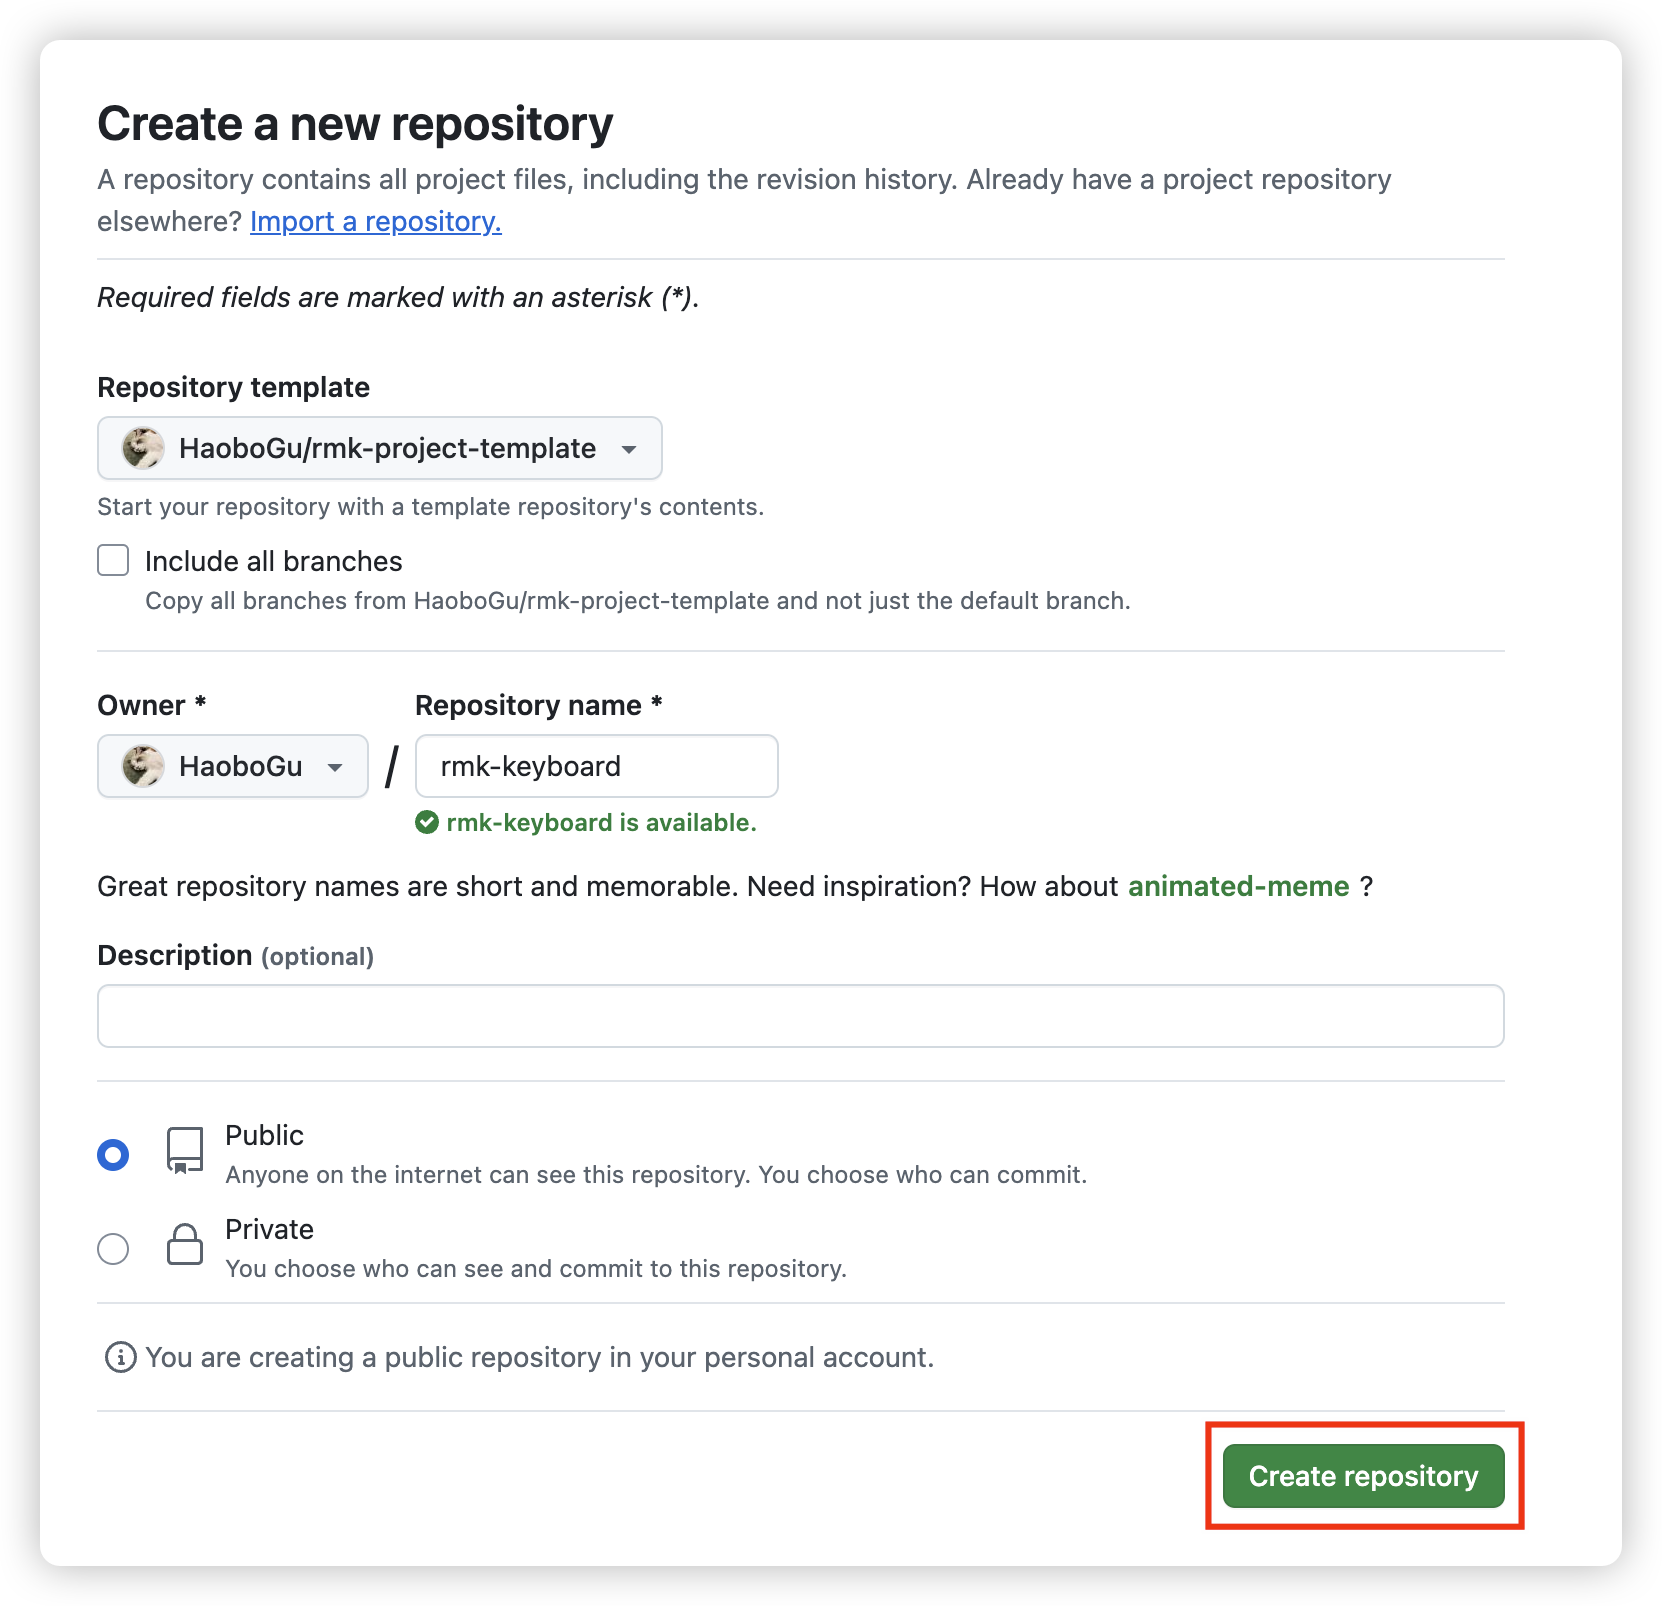
- Set your repository name, and click
Create repository
-
Navigate to your created repository, there are two config files in the project:
keyboard.tomlandvial.json:keyboard.toml: this file defines almost everything about your keyboard, follow keyboard configuration to create your own keyboard definitionvial.json: this file contains matrix definitions which will be recognized by vial. RMK now uses vial to update the keymap on-the-fly. Follow vial's porting guide to createvial.jsonfor your keyboard.
you can edit the files directly on Github by clicking the file and then choosing
edit this file: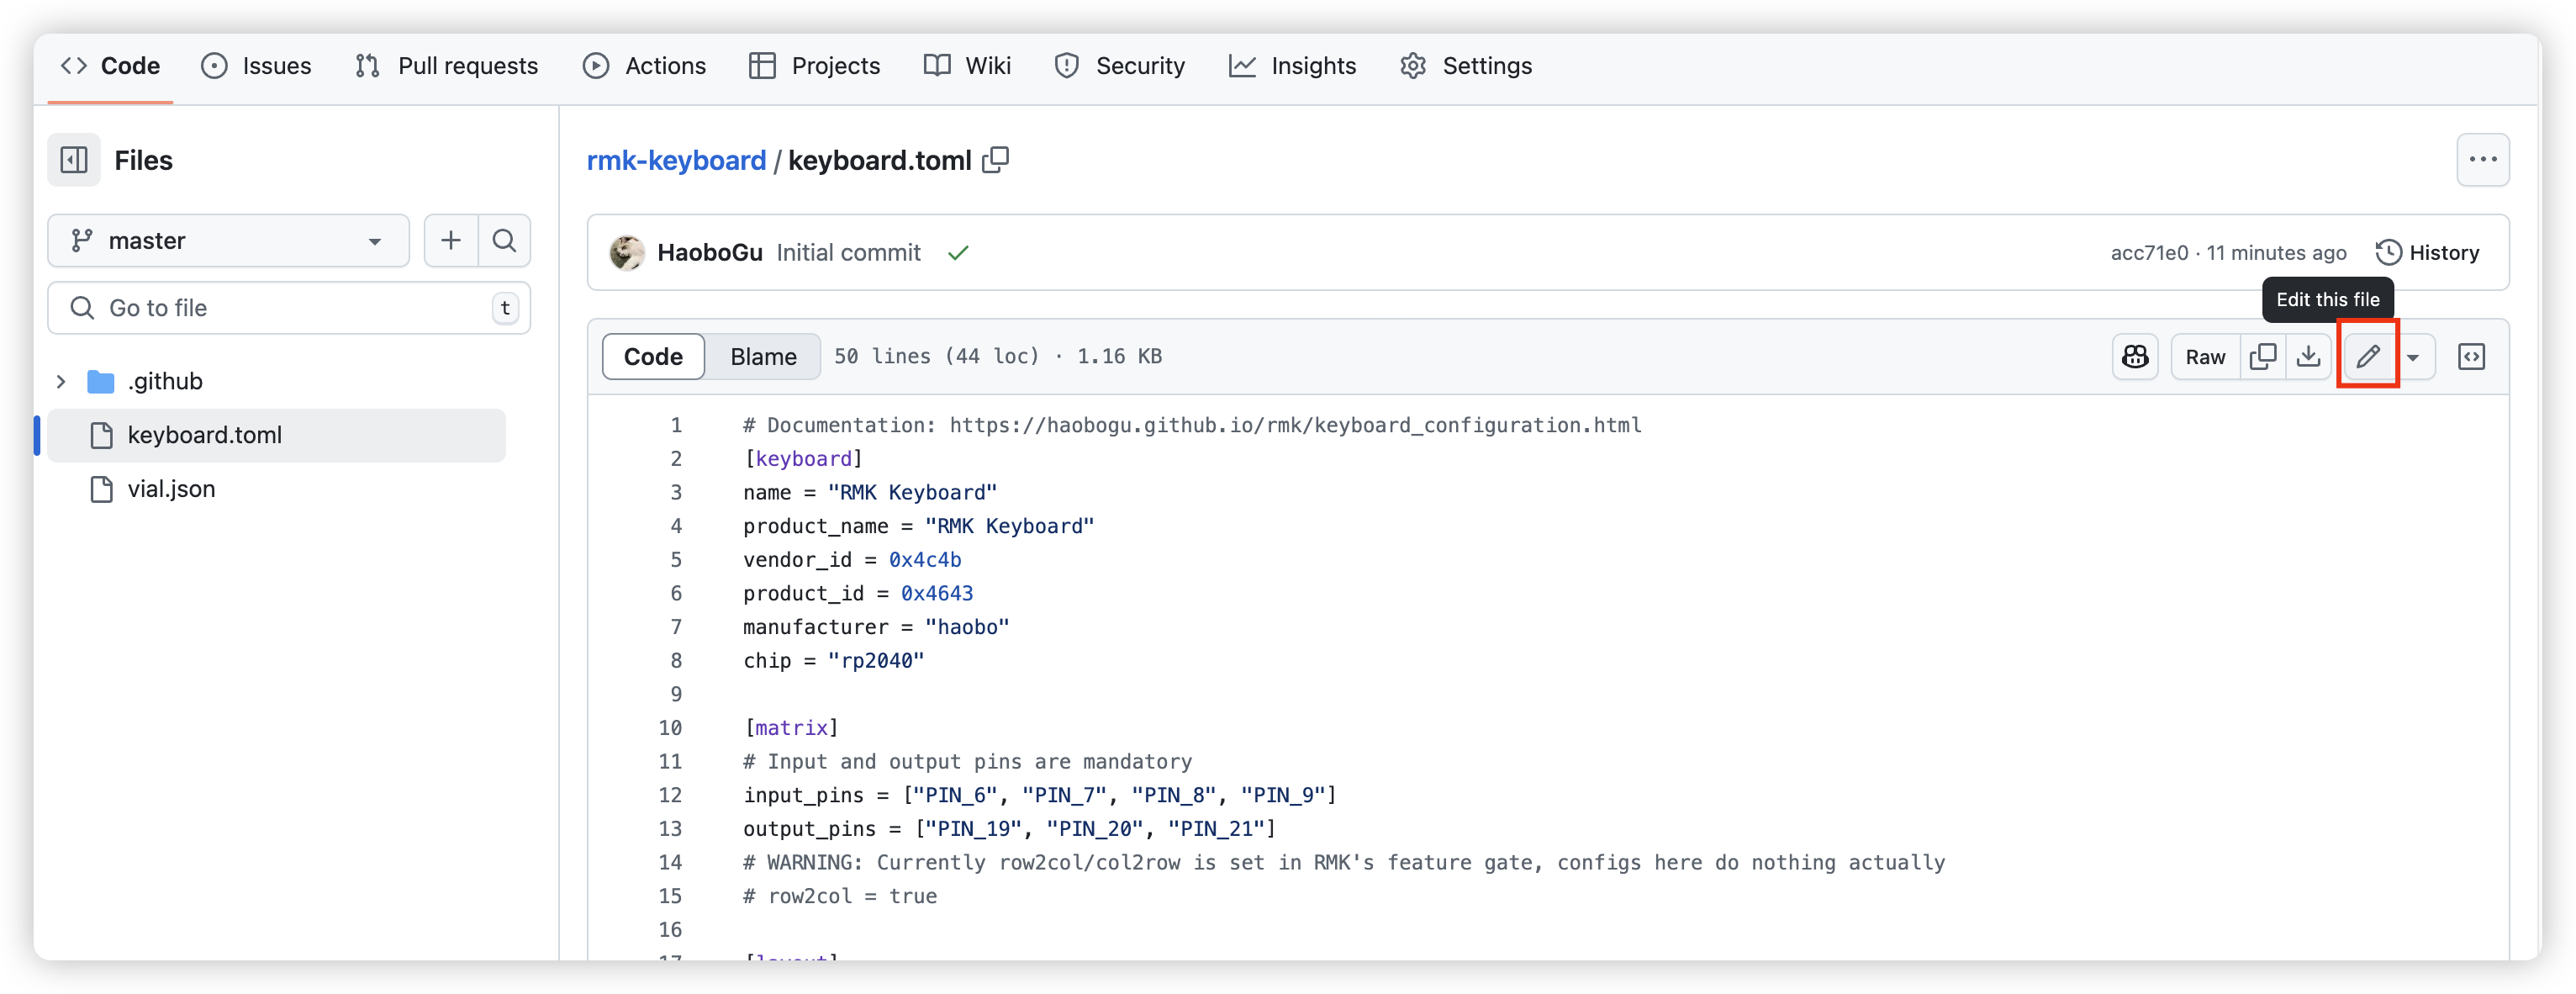 . After updating your config,
click
. After updating your config,
click Commit changes..to save it: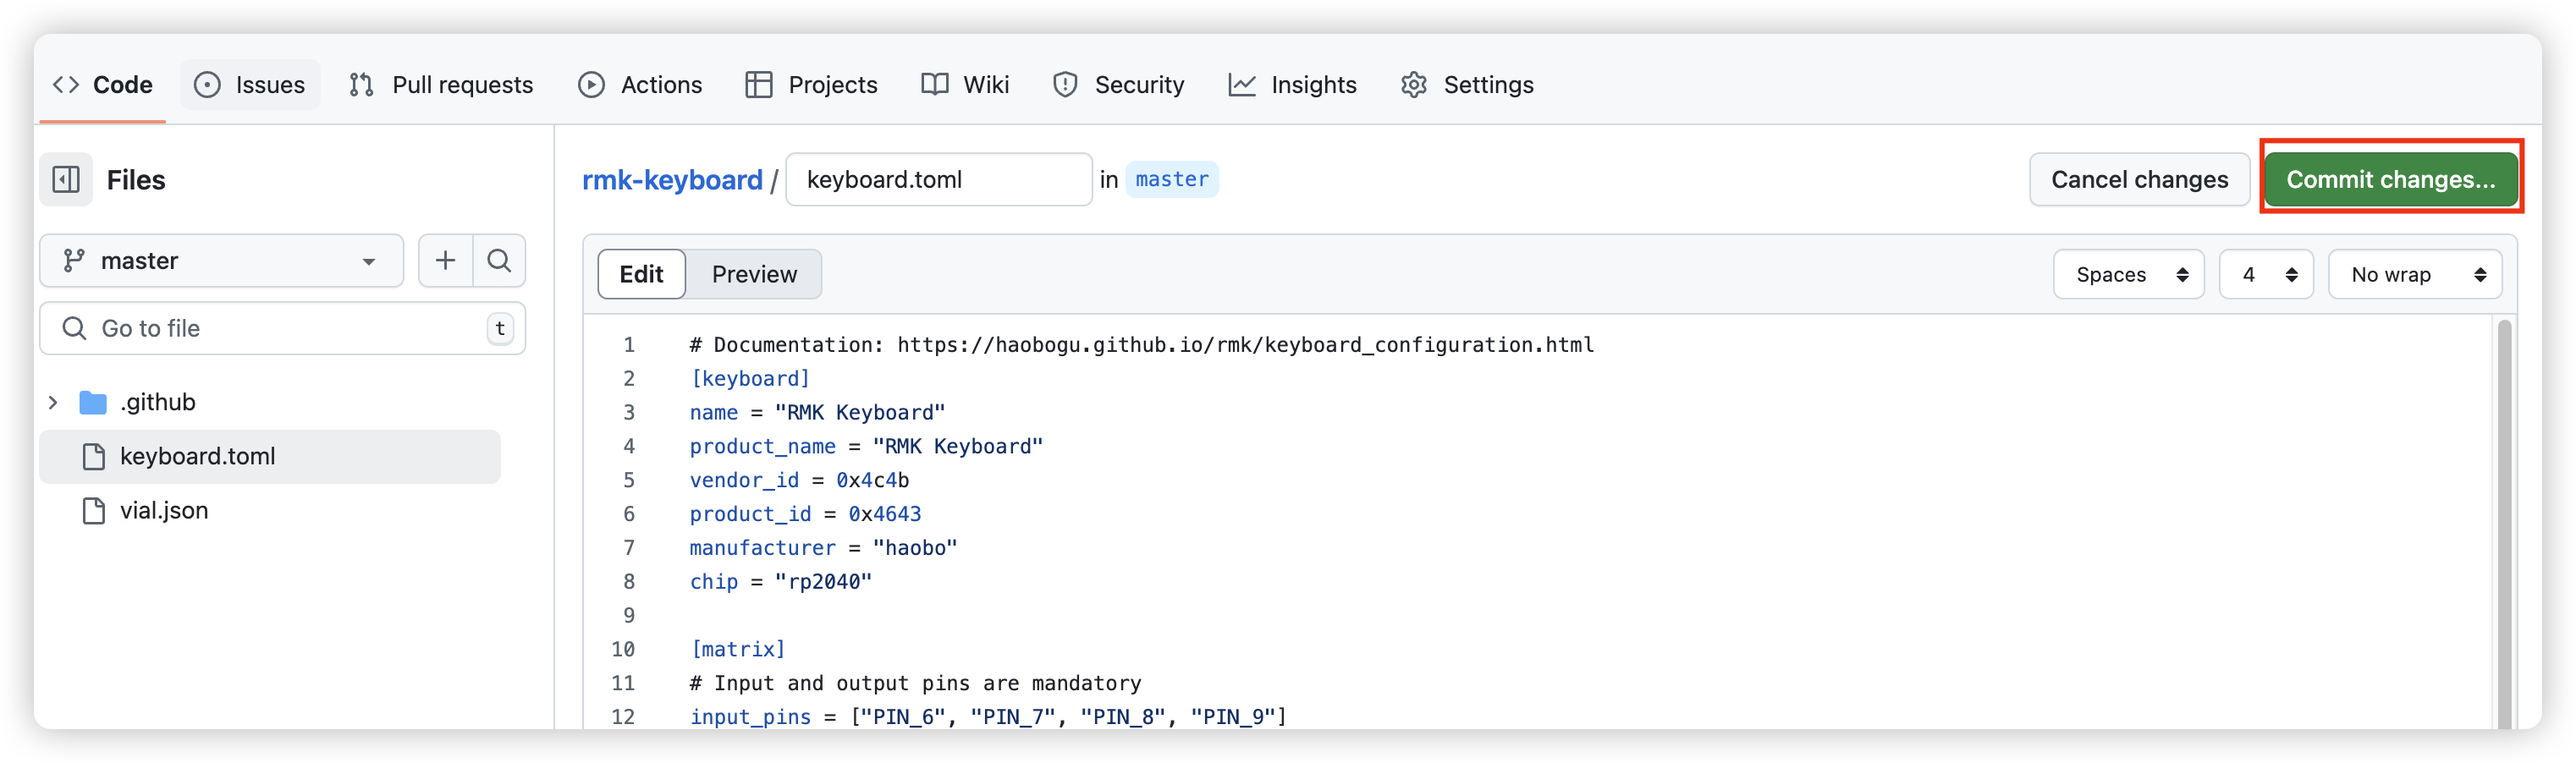
-
Once you saved your file, Github Action will automatically run to compile your firmware using your saved config files. Click
Actiontab on the top bar and you can see there's a workflow running.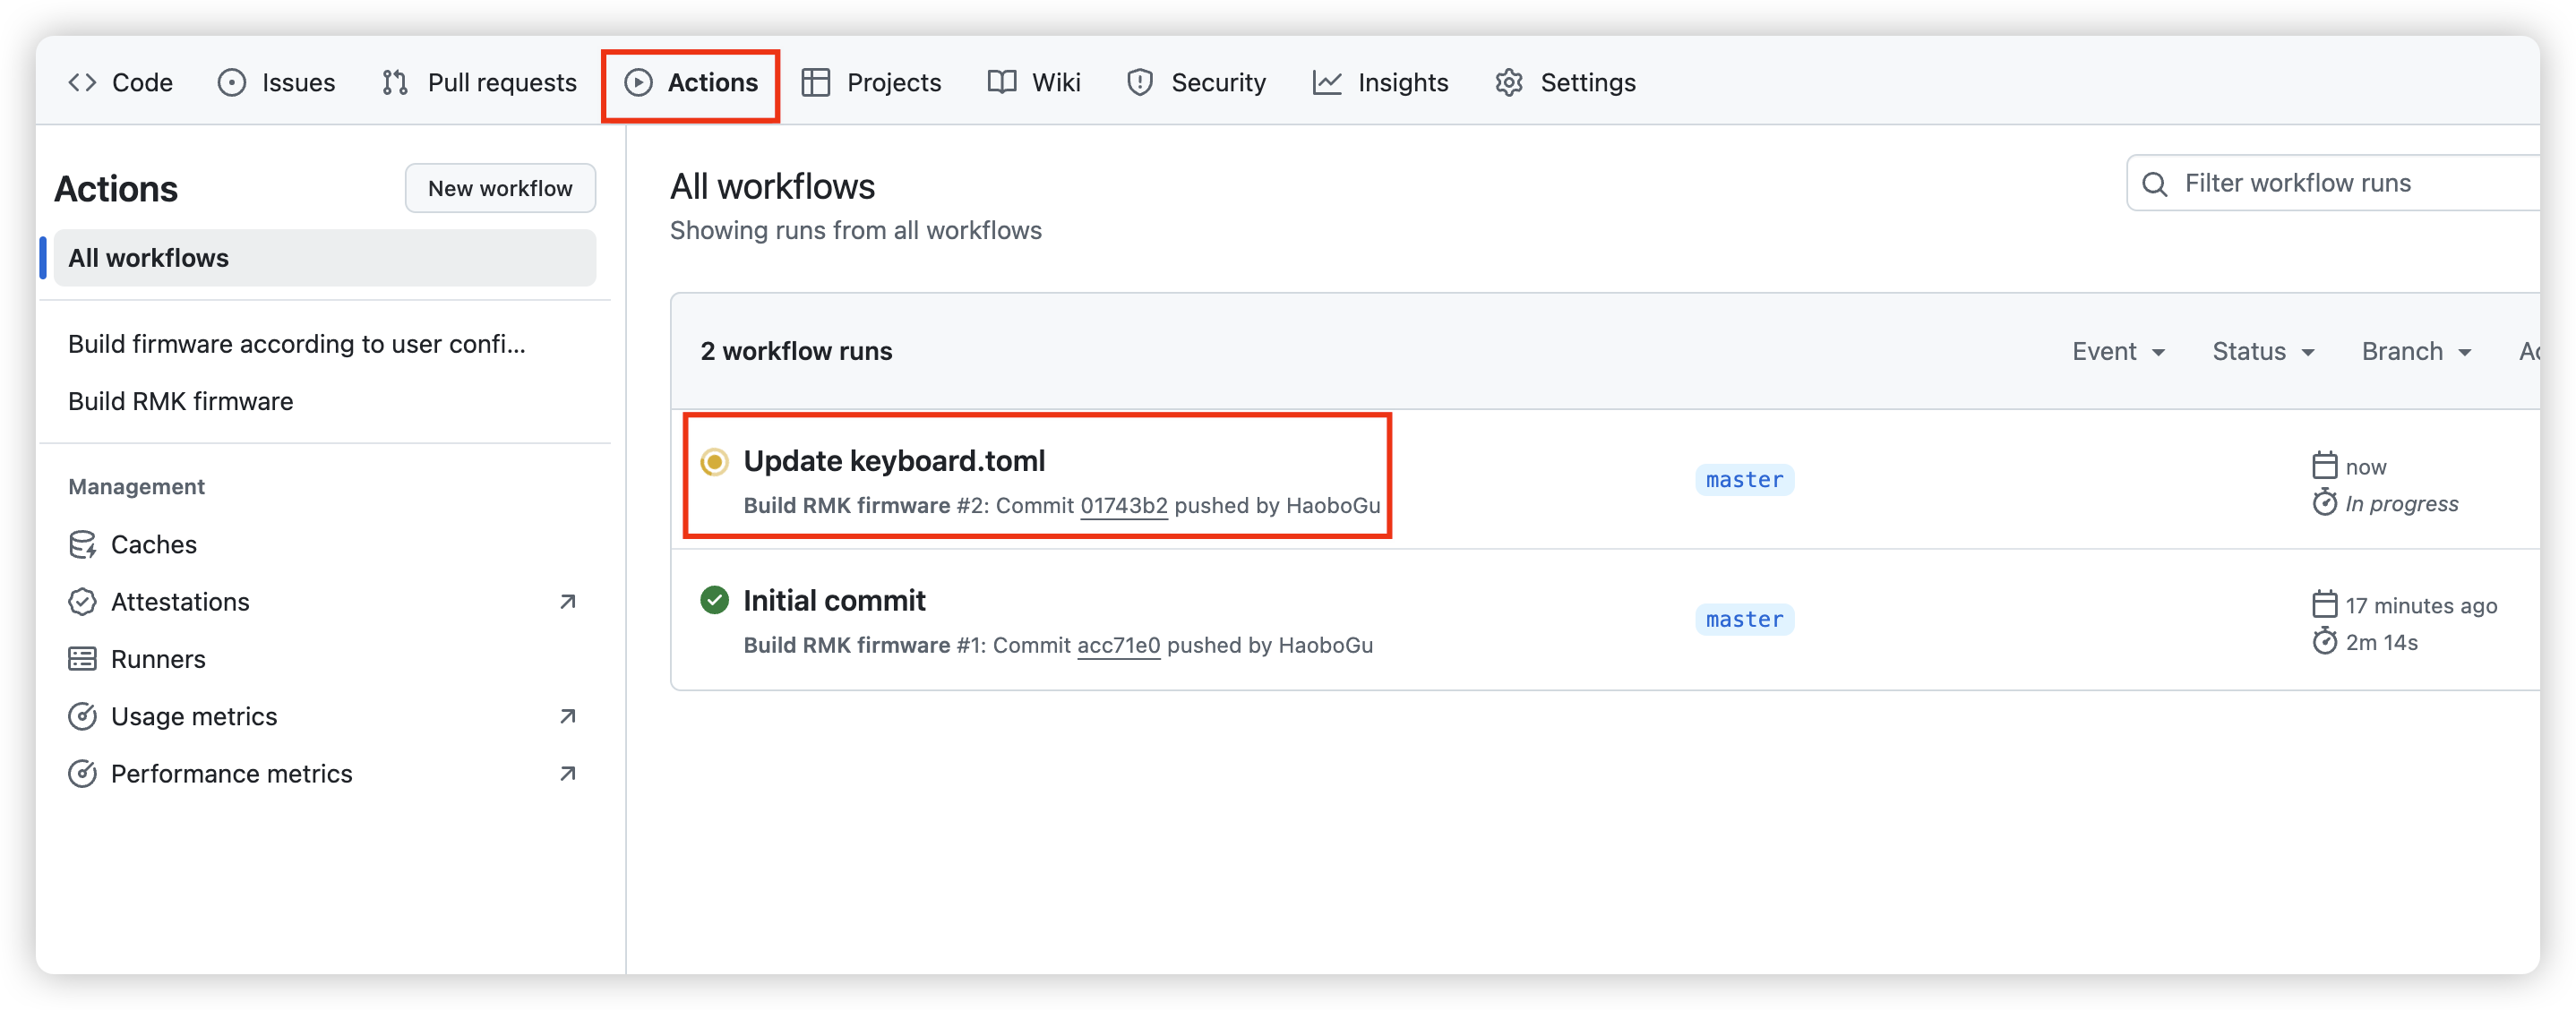
You can also check the compilation log by clicking
build/build. After the compilation finished, refresh the page and you can see the compiled RMK firmware underSummary/Artifacts: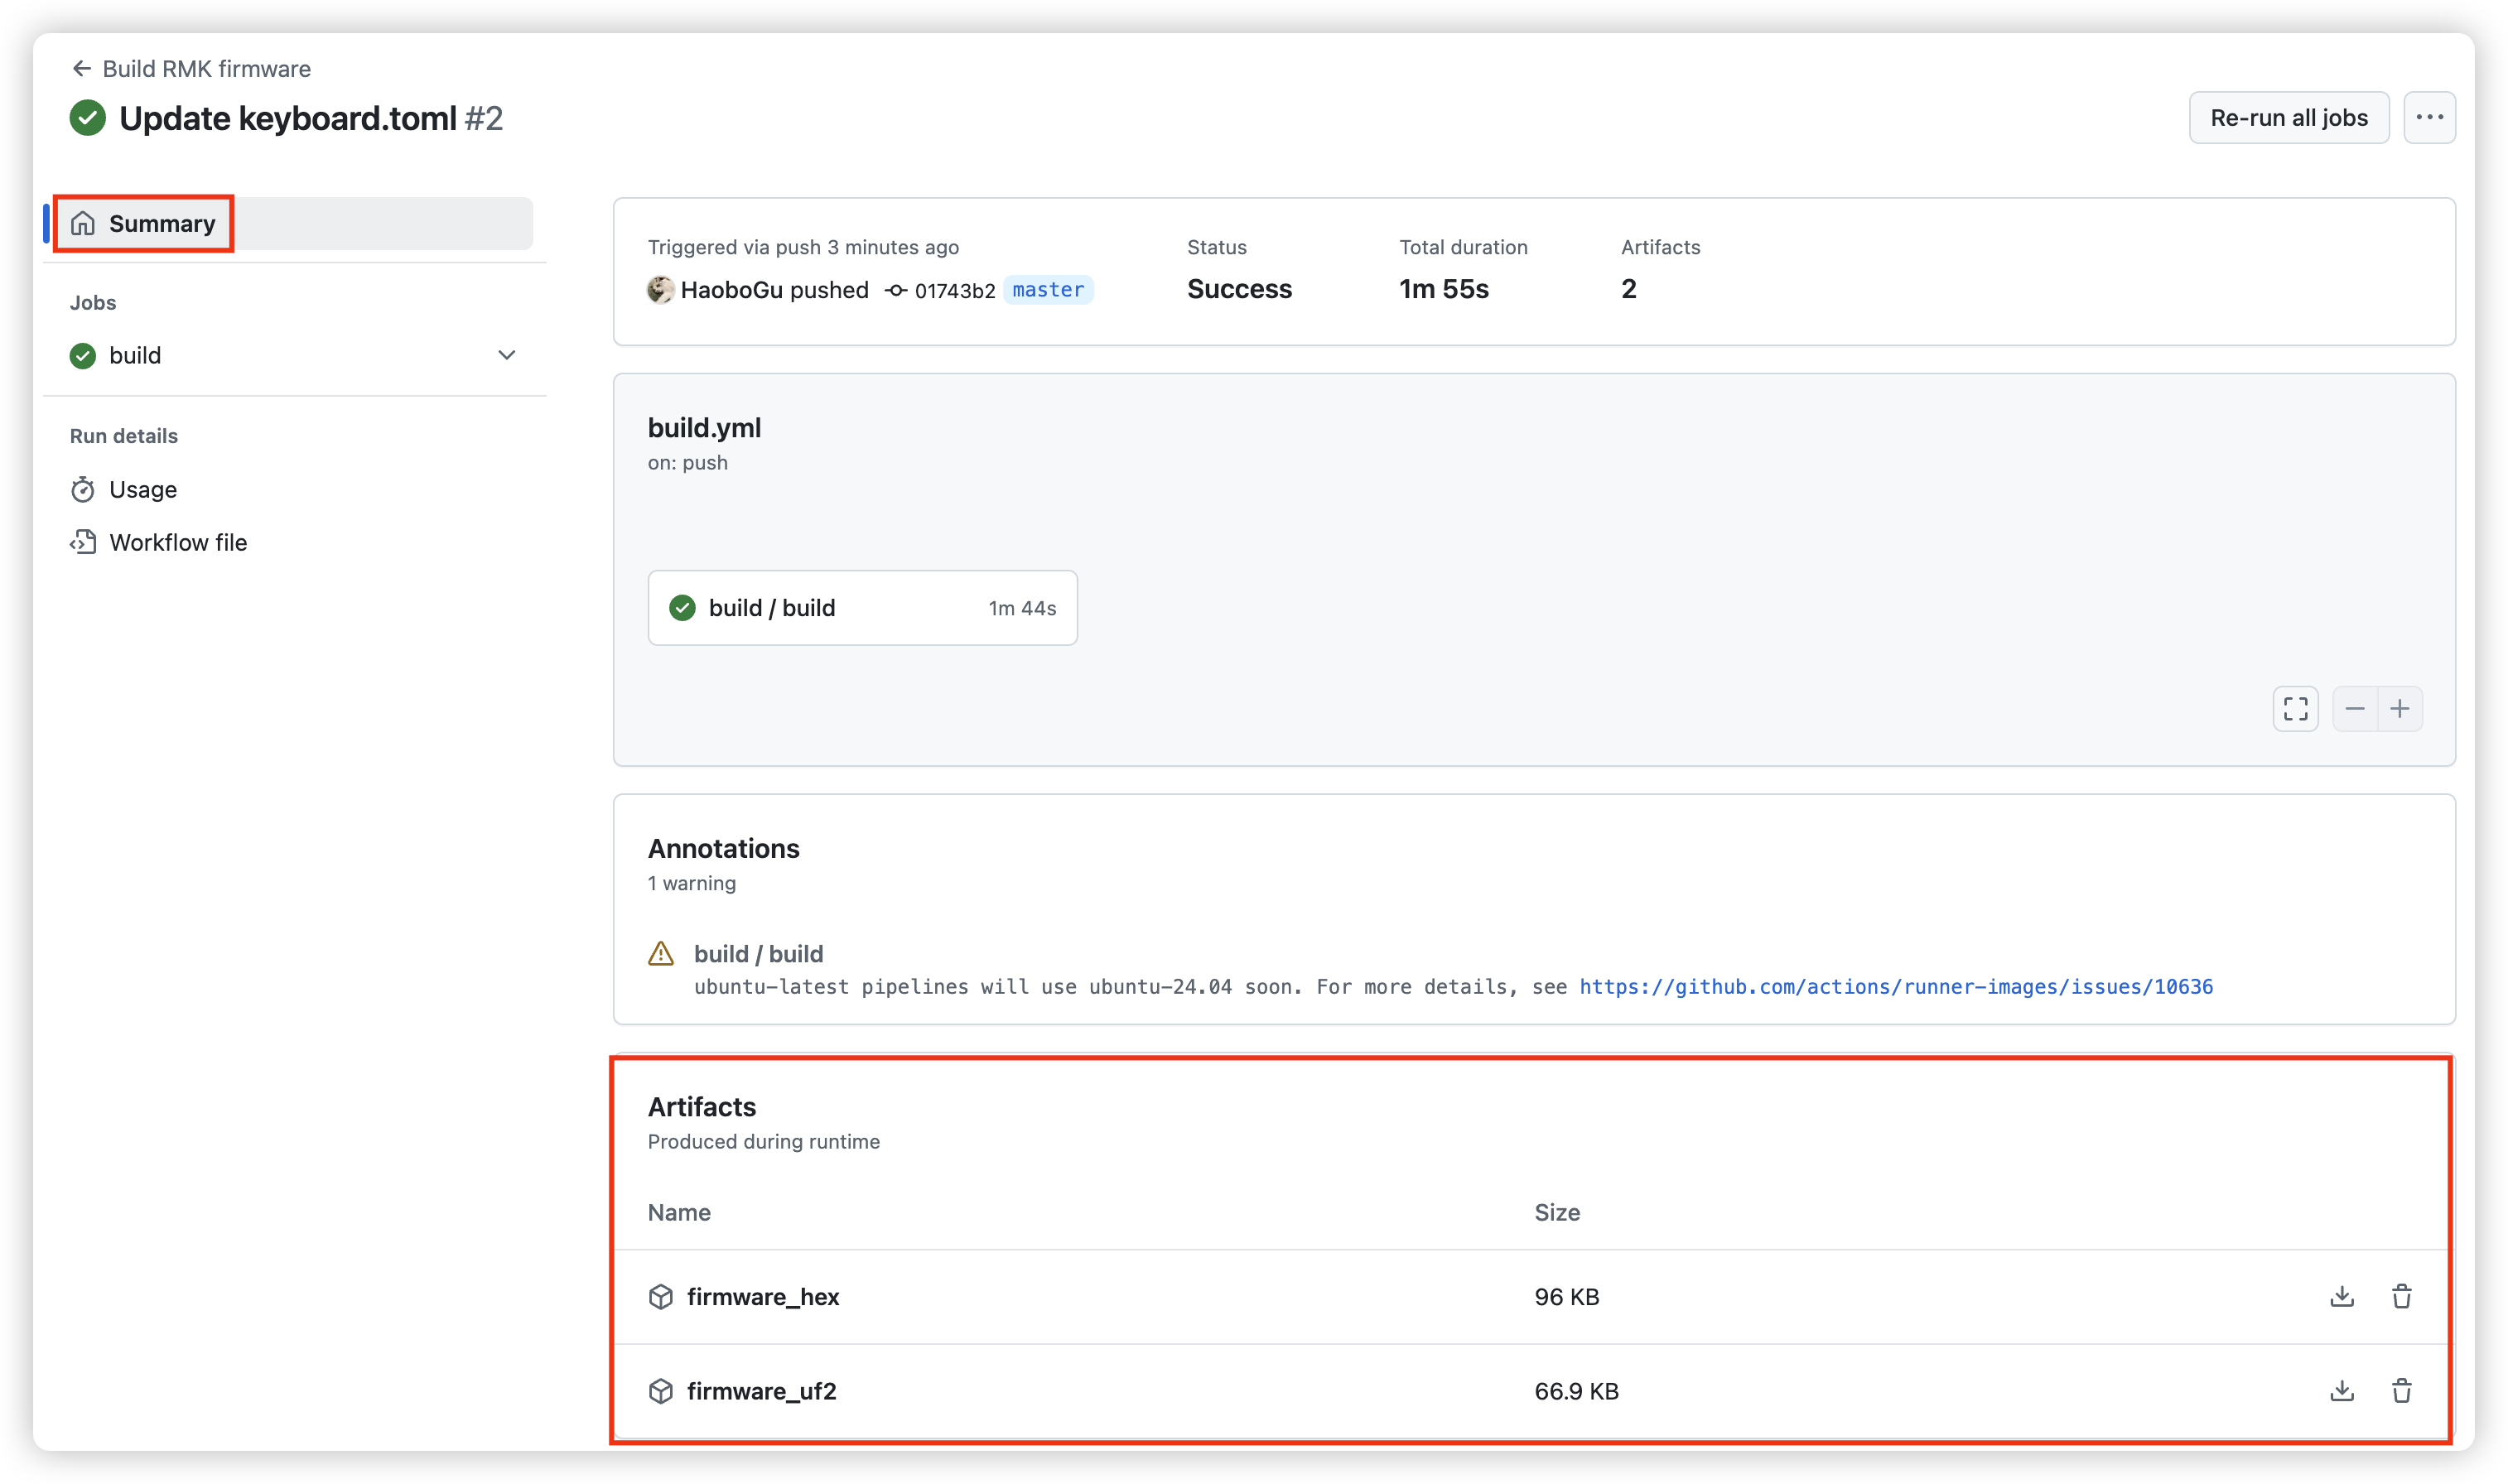
-
Now you get your RMK firmware! RMK provides
hexanduf2firmware that you can use.